

Pause every active ingredient today and switch to three things: a gentle cleanser, a ceramide-rich moisturizer, and morning SPF. That three-step scaffold is the fastest evidence-backed barrier repair routine available, and most people see real improvement within 1 to 6 weeks. If you notice spreading rash, oozing, or no change after several weeks, that’s your signal to see a dermatologist rather than keep troubleshooting alone.
TL;DR:
- Most barrier issues resolve within one to six weeks with a minimalist routine involving a gentle cleanser, ceramide-rich moisturizer, and daily SPF, provided irritants are avoided.
- Reintroduce active ingredients only after at least one full week without stinging or flaking, starting with one product at low frequency and gradually increasing.
- Avoid using harsh actives such as AHAs, BHAs, retinoids, vitamin C, benzoyl peroxide, or fragranced products during the initial repair phase, especially when skin is sensitive.
- Expect worsening appearance during the first week of repair as inflammation subsides, and do not panic; patience and consistent care are essential.
- Consult a dermatologist if symptoms like spreading rash, oozing, crusting, pain, or no improvement after several weeks indicate possible infection or more serious issues.
Table of Contents
- What Does a Damaged Skin Barrier Look Like?
- What to Stop Immediately for Barrier Repair
- The Daily Repair Routine: AM and PM Steps That Work
- How Long Does It Take to Heal a Damaged Skin Barrier?
- When and How to Reintroduce Active Ingredients
- When to See a Dermatologist for Barrier Damage
- A Clinician-Style Note on Patience During Repair
- Where Copper Peptides Fit Once Your Barrier Is Stable
- Sources
- FAQ
What Does a Damaged Skin Barrier Look Like?
Your skin tells you something is wrong before you consciously register it. Products that never bothered you suddenly sting on contact. Your face feels tight within minutes of cleansing, like the skin doesn’t fit right anymore. Some people notice a strange contradiction: oily patches next to visible flaking, as if the skin can’t decide what it’s doing.
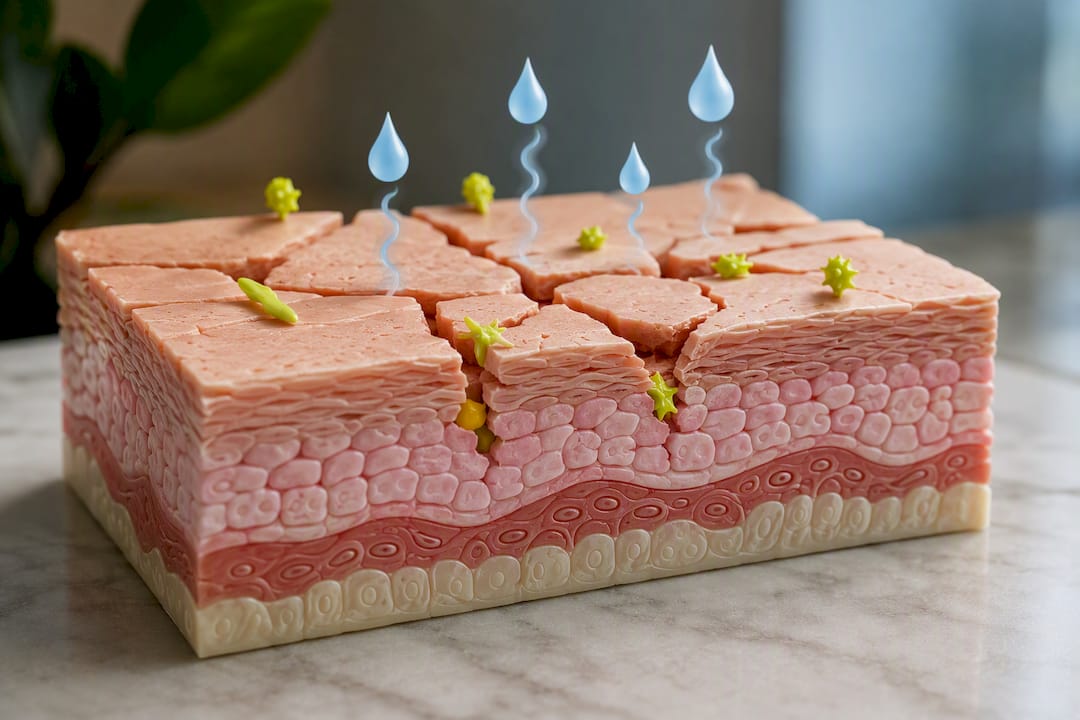
The mechanism behind all of this is straightforward. Your outermost layer, the stratum corneum, relies on a mortar of lipids, ceramides, cholesterol, and free fatty acids, to hold moisture in and irritants out. Strip that mortar away through overuse of actives, harsh cleansing, or environmental stress, and water escapes faster than it should. Dermatologists call this increased transepidermal water loss, and it’s the physiological root of nearly every symptom on this list.
Run through this quick check. If two or more of the following showed up recently, especially after starting a new active or treatment, start a repair routine now:
- Stinging or burning from products you’ve used for months without issue
- Tightness that shows up within minutes of cleansing, even with moisturizer
- Flaking combined with unexpected oiliness in the same area
- New redness, blotchiness, or a rash that wasn’t there before
- A sense that “everything” irritates your skin lately, including water
What to Stop Immediately for Barrier Repair
Fixing a damaged skin barrier starts with subtraction, not addition. Every active you’re currently applying is a candidate to pause, because dermatology consensus holds that most barrier breakdowns come from cumulative overload rather than one bad product. Here’s what goes first:
- AHAs and BHAs. Glycolic, lactic, and salicylic acids accelerate cell turnover, which is exactly what an already-thin barrier doesn’t need.
- Retinoids. Retinol and prescription tretinoin increase cell turnover and photosensitivity, both of which slow lipid recovery.
- Vitamin C (L-ascorbic acid). At low pH, this form can sting compromised skin and reignite inflammation that was starting to settle.
- Benzoyl peroxide. It’s drying by design, which works against you when the goal is rebuilding lipids, not stripping them further.
- Physical scrubs and fragranced products. Mechanical abrasion and fragrance chemicals both trigger the same inflammatory cascade you’re trying to shut down.
Beyond products, three behaviors quietly extend recovery time: washing with hot water (it dissolves surface lipids), scrubbing your face dry with a towel instead of patting it, and switching products every few days hoping something “works.” Constant switching never lets any single formula do its job, and it makes it impossible to tell what’s helping versus what’s hurting.
The Daily Repair Routine: AM and PM Steps That Work
This is the part that actually matters, and it’s simpler than most routines you’ll find. A three-step scaffold, gentle cleanser, barrier-supporting moisturizer, and daily sunscreen, is the protocol dermatology sources return to again and again, because it addresses the mechanism directly instead of chasing symptoms.
Morning routine
Start with a soap-free cleanser formulated close to your skin’s natural pH, roughly 4.0 to 6.0. Anything higher strips lipids you’re trying to preserve. If your skin tolerates it, follow with a humectant serum, glycerin or hyaluronic acid work well, applied to damp skin so it pulls in moisture rather than pulling moisture out of your skin.
Next comes a moisturizer built around ceramides, cholesterol, and free fatty acids, ideally in a ratio that mimics your skin’s own lipid composition. Finish with broad-spectrum mineral sunscreen. This step isn’t optional. UV exposure on compromised skin accelerates the exact damage you’re trying to reverse.
Evening routine
Cleanse gently again, same low-pH formula, lukewarm water only. Cleansing technique matters as much as product choice here: a quick, light massage disturbs the lipid layer far less than a long, vigorous scrub, even with a mild cleanser.
Apply your barrier-repair cream next. If dryness is severe or you’re dealing with flaking that won’t quit overnight, a thin layer of an occlusive like petrolatum on top can meaningfully reduce water loss while you sleep. This single step surprises a lot of people with how much relief it delivers by morning.
Ingredients to seek out: ceramides, cholesterol, free fatty acids, glycerin, hyaluronic acid, panthenol. Ingredients to avoid for now: added fragrance, denatured alcohol, essential oils marketed as “natural” additions.
Pro Tip: If you’re layering a hydrating serum under a heavier cream, wait 30 to 60 seconds between the two. Applying a thick moisturizer over a still-wet serum can dilute both products and reduce how well either one absorbs.
Reactive skin generally tolerates cream and ointment textures better than gels or lightweight lotions during this phase. Gels often rely on alcohol-based carriers for their light feel, which works against a barrier that’s already compromised.
How Long Does It Take to Heal a Damaged Skin Barrier?
Recovery isn’t instant, and expecting it to be is where a lot of people sabotage their own progress. Mild barrier damage typically resolves in a couple of weeks with a strict, minimalist routine. Moderate damage takes several weeks. Severe cases can take multiple weeks or longer, particularly if there’s an underlying condition like eczema or rosacea complicating things.
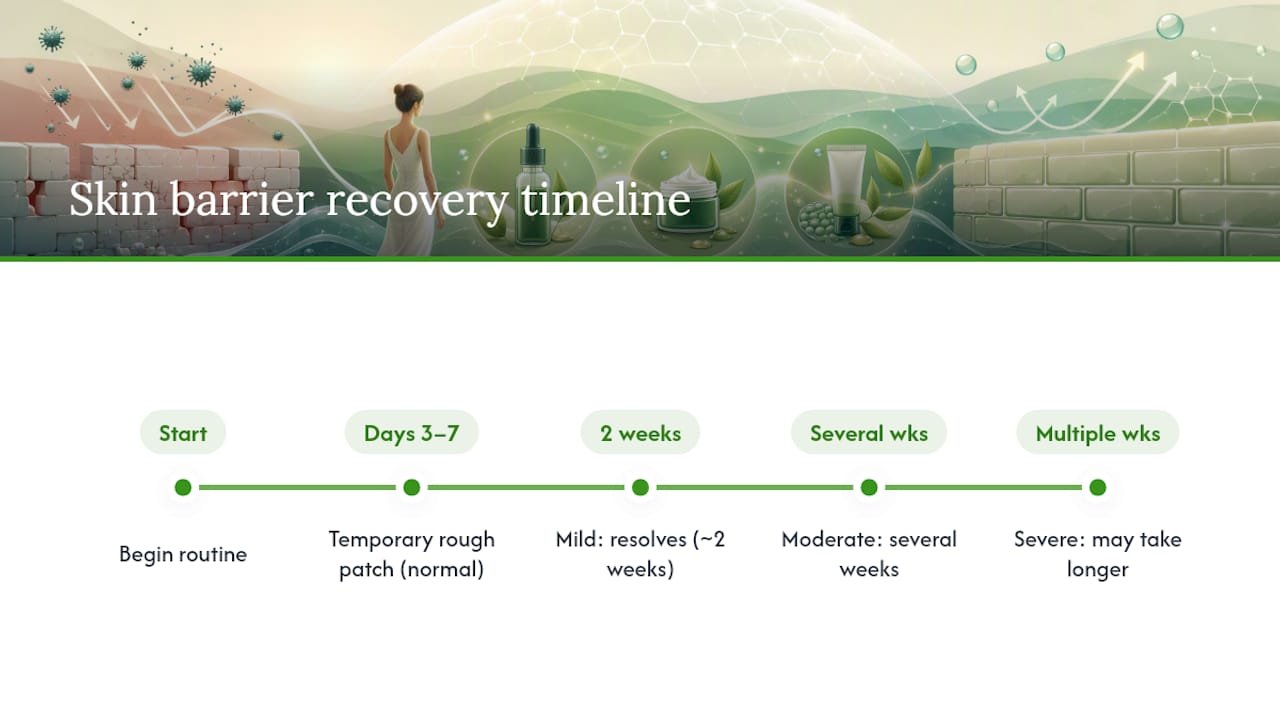
Here’s the part nobody warns you about: your skin often looks worse before it looks better. Dermatologists note that this rough patch, days three through seven for many people, is a normal transition, not a sign the routine has failed. Removing irritants can temporarily unmask inflammation that was being suppressed by the very products causing the problem.
A few things slow this timeline down further: age (skin barrier repair mechanisms become less efficient over time), ongoing exposure to wind or dry indoor heat, underlying dermatitis, and, again, the temptation to switch products mid-recovery because week one didn’t produce a miracle. Give any new routine a full two weeks minimum before judging it.
When and How to Reintroduce Active Ingredients
Rushing back to your old routine is the single most common way people undo weeks of progress. The rule of thumb: wait until stinging and active flaking have fully stopped for at least one full week before adding anything back.
- Pick one active. Not two, not three. One.
- Start at low frequency, once weekly is a reasonable starting point for most actives.
- Observe for two full weeks. If your skin tolerates it with no stinging, redness, or increased flaking, you can increase frequency.
- Wait two weeks before adding a second active. Layering multiple reintroductions at once makes it impossible to identify what caused a setback if one occurs.
- Favor gentler options first. PHAs and low-strength retinol are generally better starting points than glycolic acid or prescription-strength tretinoin.
This kind of cautious, one-at-a-time reintroduction with two-week observation windows is the pragmatic standard recommended in barrier-repair protocols, and it’s worth pairing with an actual patch test on your inner arm or behind the ear before applying anything new to your full face.
Pro Tip: Keep a simple log, just a note on your phone works, tracking what you added and when. If a flare-up happens two weeks later, you’ll actually know what caused it instead of guessing.
Stop and return to the repair scaffold immediately if you notice new stinging, unusual redness, or flaking that wasn’t there before you reintroduced the product.
When to See a Dermatologist for Barrier Damage
Most barrier damage resolves with consistency and patience, but certain signs mean it’s time to stop self-treating. See a dermatologist if you notice a spreading rash, any oozing or crusting, signs of infection like warmth and swelling, severe pain, or simply no improvement after a reasonable stretch for your severity level.
A few habits quietly stall recovery for otherwise motivated people:
- Reintroducing “soothing” actives too early because they sound gentle (some botanical extracts and essential oils are surprisingly irritating)
- Product hopping every few days instead of committing to one routine for two full weeks
- Skipping sunscreen because the routine already feels like a lot of steps
- Using heavier makeup to mask redness, which can trap heat and worsen inflammation
Before booking an appointment, try reverting fully to the three-step scaffold, adding a thin occlusive layer overnight, and giving it another full week. Document what’s changed. If a clinician visit does become necessary, that log makes the conversation far more productive than “my skin just feels off.”
A Clinician-Style Note on Patience During Repair
The hardest part of barrier repair isn’t the routine. It’s resisting the urge to fix things faster. Skin that looks rougher on day four than day one isn’t failing, it’s usually shedding the inflammatory response that built up under all those actives you were using. That’s a transition, not a setback.
Track your skin honestly for at least two to four weeks before changing anything. Write down what you’re using, what you stopped, and what you notice, because memory is unreliable when you’re frustrated and staring in a mirror. The instinct to add “just one more soothing serum” when things feel slow is almost always counterproductive. Copper Peptides Store has built its entire approach around this same principle: fewer, higher-purity ingredients outperform crowded routines, and that philosophy applies just as much to repair as it does to maintenance.
— British
Where Copper Peptides Fit Once Your Barrier Is Stable
Copper peptides aren’t a repair-phase product, they’re what comes after. Once your skin has gone a full week or more without stinging, tightness, or new flaking, that’s the window to consider adding a peptide serum back into the mix.
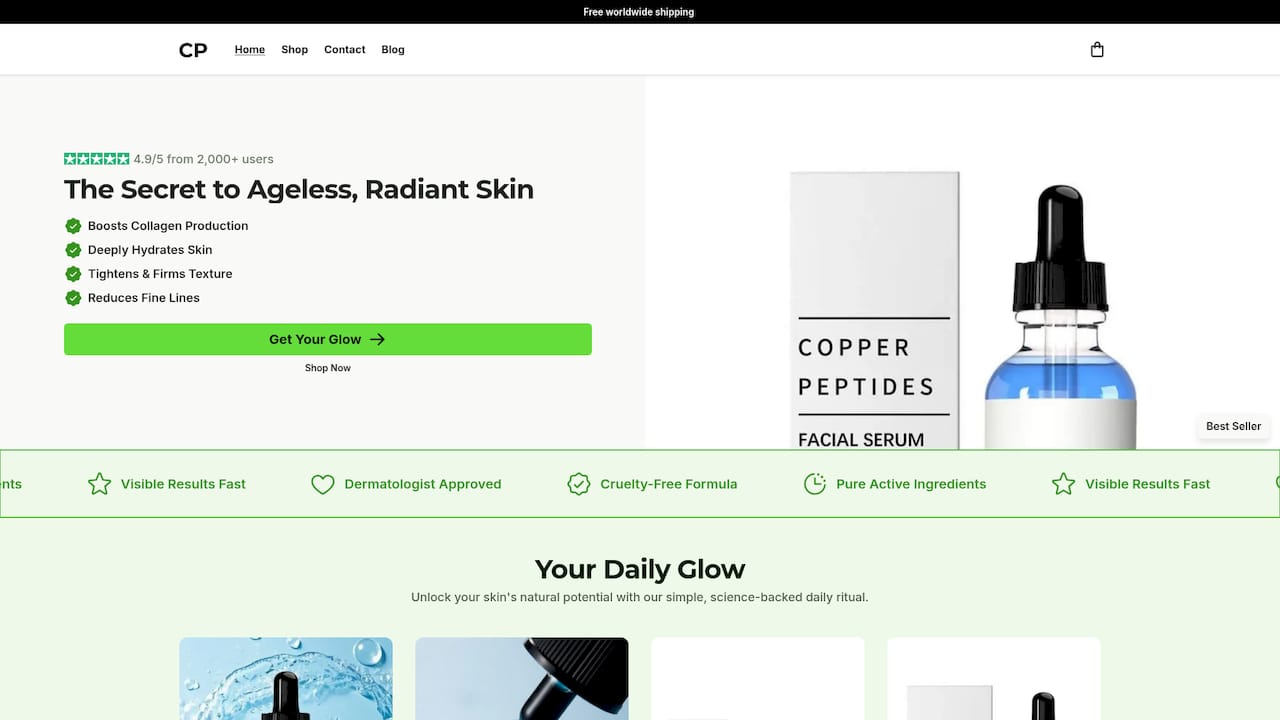
A single-ingredient copper peptide serum formulated with hyaluronic acid is available, intended to support collagen production and skin firmness rather than to treat active irritation. Because it’s a single-ingredient formula, it’s easier to introduce cleanly during reintroduction: patch test it first, apply it to damp skin under your ceramide moisturizer, and follow the same cautious frequency approach outlined earlier, starting a few nights a week rather than daily. If you want to see how it can slot into a barrier-first repair timeline, that’s the place to start, and once your skin has proven it can tolerate the reintroduction, the Copper Peptide Anti-Aging Serum is available for $20 as a one-time purchase, no subscription required, so you’re not locked into anything before you know how your skin responses.
Sources
The clinical framing in this routine draws from established dermatology resources rather than trend-driven advice. For deeper reading on barrier physiology and recovery timelines, consult Healthline’s overview of skin barrier repair, Cleveland Clinic’s guidance on barrier care, the NCBI Bookshelf chapter on skin barrier structure, and the American Academy of Dermatology’s guidance on safe exfoliation. A practical reintroduction protocol is also outlined at DermApproved.
- Skin barrier function and how to repair and care for it | Healthline
- Barrier Repair Routine for Damaged Skin (DermApproved)
FAQ
What Is a Good Routine for Repairing a Damaged Skin Barrier?
Pause all active ingredients and follow a three-step routine: a gentle, low-pH cleanser, a moisturizer containing ceramides and fatty acids, and daily broad-spectrum sunscreen. Add an occlusive layer at night if dryness is severe.
What Is the Fastest Way to Heal a Skin Barrier?
Stop irritants immediately and stick with the minimalist three-step scaffold without switching products. Mild damage can improve in 1 to 2 weeks, though moderate to severe cases take longer.
What Is the 4 2 4 Rule in Skincare?
Definitions of this rule vary across sources and it isn’t a standardized dermatology term, so treat any specific version you encounter with caution rather than as clinical consensus.
How Do I Tell if My Skin Barrier Is Broken?
Watch for stinging from previously tolerated products, tightness after cleansing, flaking paired with oiliness, new redness, or sudden sensitivity to everything you apply. Two or more of these signs points to barrier damage.
Can I Use a Copper Peptide Serum During Barrier Repair?
Wait until stinging and flaking have stopped for at least a week before introducing it. The Copperpeptides serum is single-ingredient and formulated with medical-grade hyaluronic acid, which makes it a reasonable low-risk addition once your skin has stabilized.